

As pet parents, we always want to document our pet?s lives and enjoy the time we have with them. Let?s face it; while we may like to believe that our pets are going to live forever, chances are we will live longer than them. That means you need to soak up and make the most out of the time we have them in our lives. One way to do that is by including them in fun DIYs and documenting the years they spend with us. That is why I am bringing to you, this DIY Pet Safe Ink Paw Print Picture.
Your pets paw print is something special, and a great way to showcase and include them in your life. You can create this DIY for a birthday, holiday or just to have in your house. We made this for Father?s Day but it would make a great gift for a dog lover for any occasion.
When I decided that I wanted to make Pet Safe Ink, I started trouble shooting different alternatives. Eventually I came up with this idea, which I feel safe and happy with. There are pet safe inks on the market that you can purchase, but the idea of putting chemicals on my dogs paw makes me worried. Not to mention, I don?t want anything sticking to her paw long term.
Kool-Aid is a simple and cheap alternative pet safe ink. If it sticks to your dogs paw for a while longer, it won?t hurt them and frankly, it?s pretty easy to wipe off. The different colours also make it unique and easy to tailor to the gift receiver. So lets get started on this DIY Pet Safe Ink Paw Print Picture.
Materials:
- Kool-Aid Powder Mix
- Picture Frame
- White Cardstock
- Pet Safe Wet Wipes (BarkBar Dry Grooming Multi-Purpose Wipes for Dogs)
- Pencil
- Pen
- Scissors

Steps:
- Make sure you have a clean surface and have all of your materials set out.
- Measure your white cardstock against the picture frame insert or glass. Make a mark using your pencil on the white cardstock the size of the glass insert and cut out the cardstock with your scissors.


- On a plate or in a shallow bowl, pour your Kool-Aid powder mix. I could only find Kool-Aid singles, so I used about 2 and a half packages. If you have a larger dog, you will need more because their paws will be bigger.
- Next, add a very small amount of water to the powder mix. You don?t want to add too much because you don?t want it runny. Combine the powder mix and the water into a paste. If you have added too much water, add more Kool-Aid.


- Pull out a 3-4 Pet Safe Wet Wipes. We use BarkBar Dry Grooming Multi-Purpose Wipes for Dogs.
- Take your dog and check to make sure their paw is clean. Then dip their paw into the Kool-Aid paste you have made. Depending on your dog and your paste consistency, you may have to paint their paw. Just use a regular paintbrush or a glazing/marinating brush. I wouldn?t recommend using a metal spoon because this may be cold on your dogs paw.
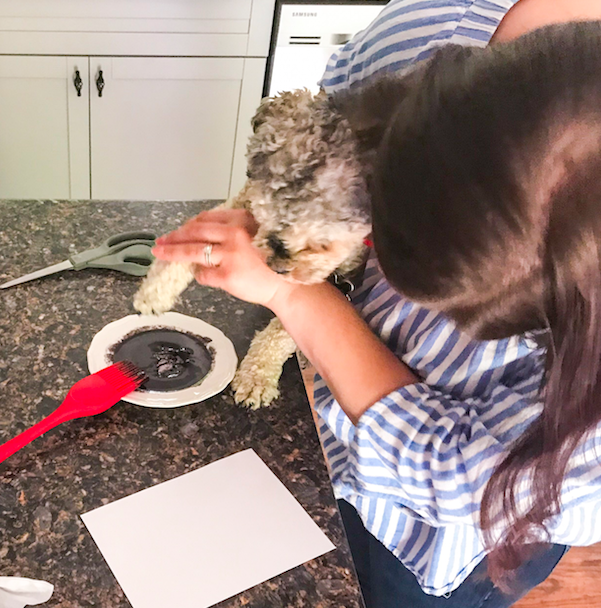

- Once your dog?s paw is covered in the Kool-Aid paste, quickly place their paw on the white cardstock. Aiming to have it in the middle or slightly higher.
- Pick up their paw and wipe it with Pet Safe Wet Wipes. Depending on your dogs colouring, it may be ideal to wash their paw with soap and water to get the Kool-Aid colour out. However the Kool-Aid is safe for them to eat if there is a small amount still left on their paw.
- Wait for the paste to dry for 8 hours or I recommend overnight. The dried Kool-Aid may be sticky, so leave it in a safe place.
- Underneath the paw print, write your dogs name, the year and the occasion, in pen or marker. For example, we wrote Marlee?s Paw ? Father?s Day 2018. Once everything is dry, put your cardstock in the picture frame, and wrap it up to give as a gift, or just hang it in your home as d?cor.
There you have, 10 super easy steps to Pet Safe Ink that you can use for any project. Even if yours turns out not so neat like ours did. That doesn?t mean you can?t still give it as a gift. I feel like the imperfection of the paw print makes it more special because life, especially with animals is never perfect.
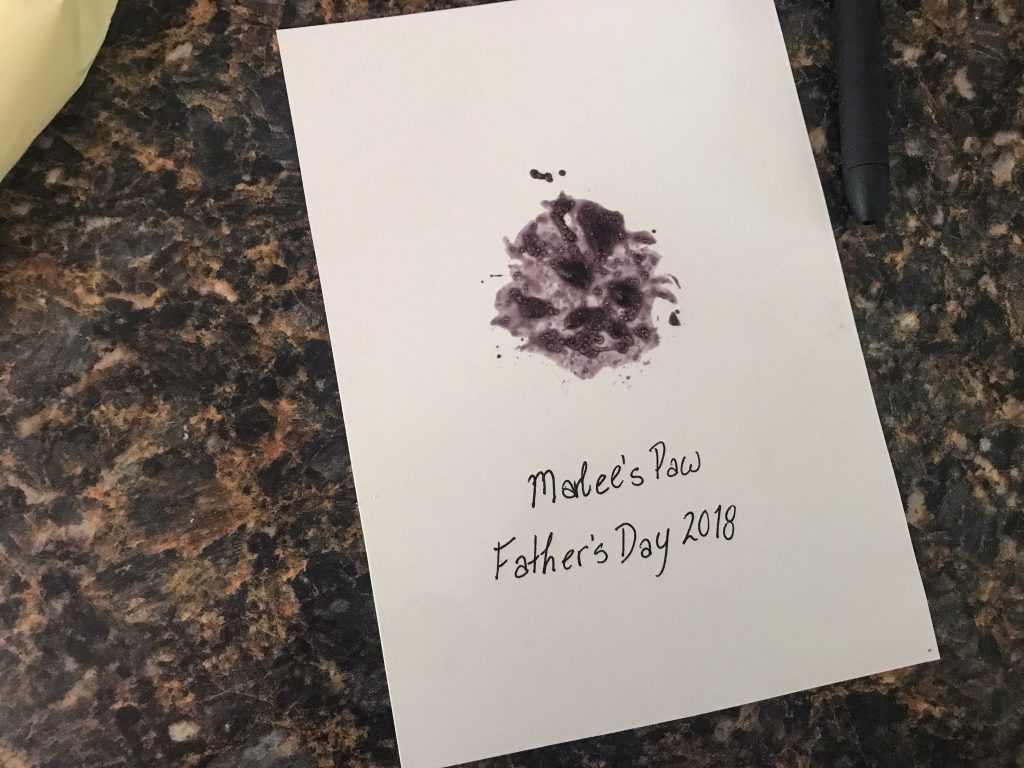
What made Marlee?s paw print so messy is the fact that she has a ton of fur between the pads of her paws. If your dog has fur between their pads like Marlee does, would recommend trimming the hair. We didn?t do this because Marlee hates us touching her paws (as most dogs do) and our groomer does this for us. Marlee is in between grooming appointments right now so we don?t want to mess up our usual schedule.
However, like I said, the imperfection of the paw print is totally okay with us. What matters is the time we spent with our dog creating her paw print and documenting this time in our lives.

We hope that you have enjoyed our take on alternative pet safe ink and that you find this useful for your next DIY project. Let us know if you try out this Pet Safe Ink and what projects you have done that included your four-legged friend.
Don?t forget to check out our other DIY projects!
Wet Kisses and Tail Wags,
Karlee and Marlee
One Reply to “DIY Pet Safe Ink Paw Print Picture”